We understand that while we may be old hands at online shopping this is not the case for many of our customers. We have there for compiled this selection of screen shots that will hopefully explain the shopping process from beginning to end.
Step 1 - Create an Account and Log In
Click the Log In link on the home (front/starting) page of our store.
 |
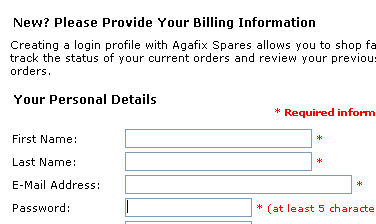
Step 2 - Enter your contact details and create a password
 |
Step 3 - Finding products
Products can be found by either browsing the categories on the left or using the search box. We have to unfortunately admit that the search functionality of our store could be better. For example if the product you are looking for is a dome then entering domes will find nothing but dome will (This example assumes the product is listed as a dome)
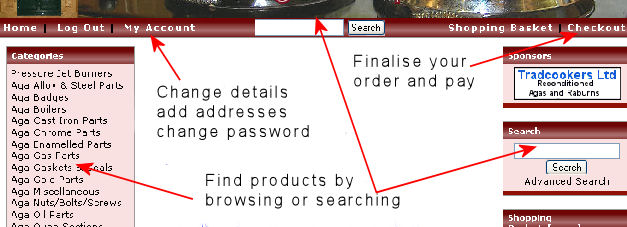
Following the My Account link enables you to update all your contact details, change your password, add additional delivery addresses or update any current ones and finally view the status of all orders.
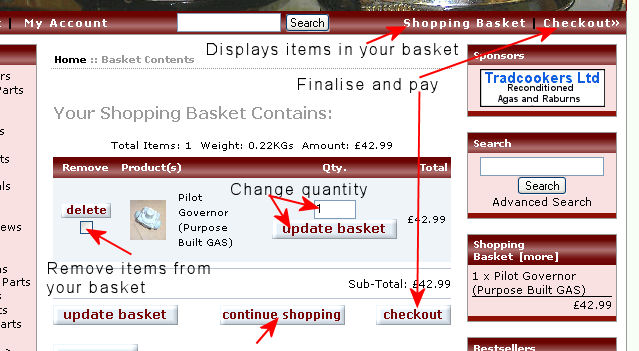
Clicking the Shopping Basket links displays all items currently in your basket.
Step 4 - Adding products to your shopping basket
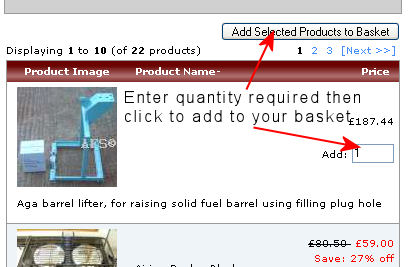
There are two shopping cart views. The first is the list view and is seen when first browsing a category or viewing the search results. This view has multiple items listed with quantity boxes next to each. You simply enter the quantity required of any products in the list and then click the Add Selected Products to Basket link. This will add multiple items in one go.
 |
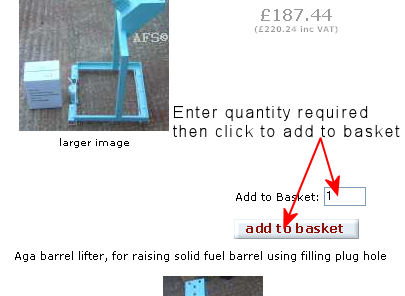
Clicking any item in a list will take you into the detailed product view. This view gives you much more information and also displays any additional images there may be.
 |
Once products have been added you can click the Shopping Basket link at any stage to view the contents
 |
Step 5 - Checkout and choosing a delivery address, delivery service and payment method
When you have all required items in your shopping basket you begin to finalise your order by clicking the Checkout link as in the screen shot above. Then choose a delivery address. This can either be the default one used when you registered for your account or you can now add additional ones up to a maximum of 5.
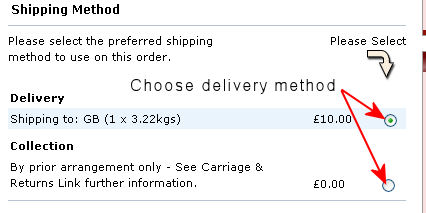
Now choose a delivery method. There is also a field to enter any special instructions or requests you may have regarding your order.
 |
Move to the next stage by clicking the continue button.
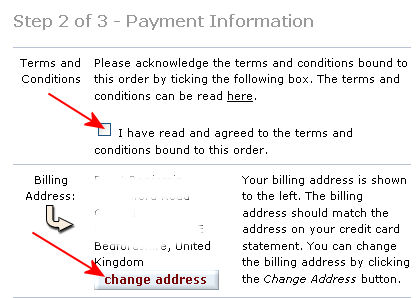
The next step is to read and accept our terms of trading. You then have the option to add a billing address if this is different to the delivery address.
 |
Choose a payment method.
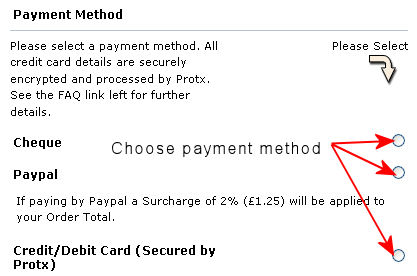 |
Please note that there are surcharges on some credit cards but on the flip side we offer discounts when debit cards are used.
If you have been given a promotional code for example where we are running a sale you enter it in the fields as shown below. You also have a second chance to enter any special instructions.
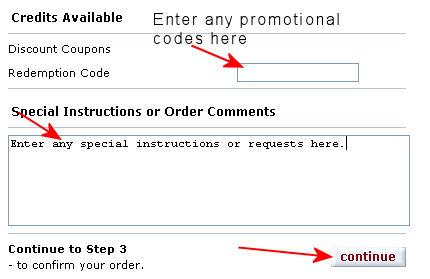 |
Click the continue button to move to the next stage.
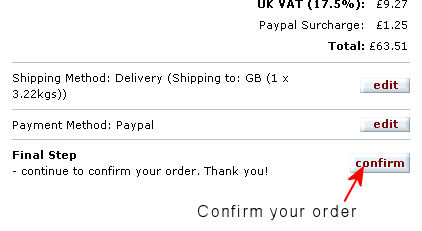
You now have a chance to review your order and make any final changes before clicking the confirm button.
 |
On successfully completing your order you will be presented with a link to download or print a copy of your invoice. We will also send you an automated order confirmation. At any stage you may log into your account to view the current status of your order or reprint a copy of your invoice.
When the status of your order changes, we have any questions or your order is dispatched we will send you an email.
I hope this information has made the process easier to understand or less daunting but if you still have any questions or suggestions on how we can improve this page please feel free to email us.


